Labels

Showing posts with label Advanced Skills. Show all posts

Wednesday, 30 November 2011

Using an automatically generated rig?

In this blog post, I shall be investigating the "Skeleton Generator" that is brand new to Maya 2012.  I will be applying a skeleton made using the Skeleton Generator to a basic model and then trying it out to decide whether this is really the way forward or if I am better off rigging it from scratch.
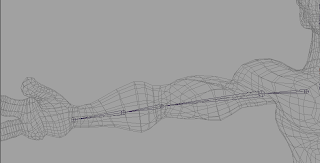
In order to shape the rig around this model, I had to scale it until it was roughly the same size as the model, and along with that, I had to then move the joints until they were in alignment with the relevant areas on the model, namely the arms and the neck.

The skeleton generator allowed the user to increase the number of joints in the fingers simultaneously.  However, this meant that the thumb would gain extra joints too, and as a thumb has one less joint than every other finger normally, I had to delete the extra joint.
The joints were all straightly aligned and were without any curvature.  I had to rotate the joints in order for it to fit with the model, particularly the arms, which required a bend in the elbow.
Another thing very worth noting that the joints in this rig, by default, are not correctly aligned with the axes.  I had to manually go through and alter the local rotation of the joints, particularly the fingers, so they bent the right way.
I had to go through the the whole rig and make sure that the local joint orientations were correct.  I understand that the skeleton generator had to leave a lot of things very basic, in order for the user to customise them to their own needs, but it seems that I have spent far more time tweaking the rig, than if I was to construct it manually, which I feel is making the whole process of rigging far more mundane and less creative.
Along with a generator for the joints in the fingers, there is a generator for the joints each of the toes.
As with everything else that is generated with this tool, the user would have to move the joints around so that they fit within the model.
On top of that, I had to move the joints to create the bend, and I also needed to make sure that both feet were symmetrical.  Next time I do this, I would probably shift select the same toe on both feet to move both simultaneously, to make matching them both easier
In order to see how this model would move with the rig, and if the influence that the joints had over the vertices would be any more accurate, I inserted some very basic IK handles, a few clusters and some controls.  I then bound the rig to the model with a smooth bind.

The bind is largely accurate, there is not a huge amount of amending that needs to be done, but there are still some issues with the initial bind that are quite typical when it comes to binding models to rigs, namely the drastic bends the occur in the elbows and knees.
 Also, when I turn the head, there is a huge amount of influence on the chest, coming from the neck joint alone.
This can be resolved fairly easily, using the connections editor to increase some of the influence in the head and remove it from the chest.  So from this, I have found that a generated rig made using the inbuilt rigging system in Maya 2012 is good for producing rigs that are largely well weighted (but not entirely), meaning that they are convenient for rough animations tests or for producing animatics (if the user wishes to use Maya as an alternative to drawing).

However, this skeleton generator completely sucks the creativity out of rigging; the user will spent far more time, simply tweaking the rig, just so it fits model and amending the many issues that the rig has, that are not resolved by default.  From doing this, its just seems better to produce a rig manually, as I can learn all of the technicalities but then apply those in a creative form, so that they animator can really make the most out of a character's physical form.  With my alien rig, because I chose to go into the depths of Character Rigging, I was able to apply my knowledge to realise this character, and I was able to come up with a system that could accomodate the movement of three toes.

Furthermore, resolving any problems that would naturally come up in a manually constructed rig is far less gruelling, as I can resolve them as I am constructing them; as opposed to an automatic rig where the majority of time is spent going over each part of the rig to spot problems.  Another important factor is that this rig can only really be generated to accomodate human characters, and when I say human, I mean to the exclusion of other primates, other bipedal animals and any other type of humanoid character that you can think of.  This will not be suitable for the Cat and Rat project that I am working on either as there is only one human character, who's appearance will be very caricatured and all the other characters that will be appearing in the piece will be quadrupedal animals and this generator will never accomodate these kinds of characters.

Luckily, I have previous experience in rigging quadrupeds, as you will see in this post, where I rigged and weighted a wildebeest for a project called Cradle of Civilisation.  I think my ability to rig quadrupeds will be much more proficient, given that I now have a greater understanding of weighting and using the connection editor in conjunction with the weight painting to make the movement more natural; along with the correct use of clusters, the difference between IKRP and IKSC and also IK Spline Tools.  The one thing that I am concerned about is that in the two previous attempts at rigging, they have worked fine apart from one clavicle, when manipulated in a certain way, and I have been completely unable to rectify this one problem.  I am going to need to look into this over the next term, in case it starts to create problems when I am actually rigging people's characters.

Monday, 28 November 2011

The alien rig so far

Here is a video to demonstrate what I can do with the rig so far.
It mostly works well, but it does have one problem, which is in the left upper-arm and happens only when I try to use the back control.
When I move the back control, the upper arm collapses and the forearm just stays in its place; in contrast to the right arm, which moves perfectly.  I have tried several solutions, such as using the component editor to either increase or remove influence from the shoulder or the forearm and also painting and removing weights, but none of these seem to work.  I have also tried reconstructing the controls in the left arm from scratch but this also does not work.

If I manage to find a solution to fixing this problem, I will post it up here.

Wednesday, 23 November 2011

Component Editor and Weight Painting

Next, I needed to use the component editor to make sure that all the vertices around the chest only moved with the chest joint.  In order to do this, I selected all the vertices around the chest and in the component editor, increase the amount of influence that these vertices have on the chest, thus removing it from other areas.
 I then brought the chest control forward and used the painting weights tool to emphasise how far forward the chest could move.

I then moved the hips and then emphasised the amount of movement that the hips could make by painting on more weights.
 The when I moved the neck control for the alien rig at first, the head would twist around abnormally, so in order to fix this, I selected all of the vertices of the head only and using the component editor, I linked made all the vertices' influence to the skull joint only.
 Now if I rotate the head, the whole head moves perfectly and none of the geometry is disrupted.

 Lastly, I had to use the component editor to increase the influences in the elbows, in order to avoid them caving in on themselves.  I did this by bending the arm, selecting the vertices around the elbow and slowly increasing the influence of the elbow joint.

Sunday, 13 November 2011

Component Editor

I have already mention the painting weights tool as a means of increasing or decreasing the influence that the rig has on the geometry of a model.  However, using painting weights alone is not always the most proficient means of setting up the physicality of a character rig, as it is very fiddly.  The tutorial has introduced me to the component editor.  This allows me to remove relationships that vertices have with certain joints if they are not supposed to be there; for example, if the foot joint of the right foot, causes some of the vertices on the left foot to move as well.
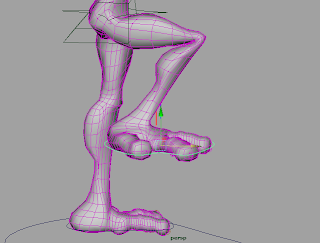
 When I life up this foot and then rotate it on the X axis, you will see that the heel actually caves in on itself.
 In order to fix this and retain that nice curve in the heel when the foot rotates, I selected the vertices of the offending area and then I selected the Component Editor.   For the right foot joint, I just selected all of the vertices and set the values to 0, thus removing a large amount of excess influence that this joint had.

Here is how both the alien's feet look now, a nice curve in the foot, no matter how they bend.  Also, please not that the feet are not actually colliding into one another, that is merely the angle that I took the screenshot from
Next, I shall use the component editor to sort out the sway of the hip.  If you observe this very basic keyframe animation that I produced to test the movement, you will see that a lot of vertices clash into one another as the hip sways from side to side.
In order to resolve this, I went into front view and I selected several vertices around the crotch area that were colliding into one another.
 I opened the component editor and as you can see below, the root joint was having a profound amount influence over these vertices.
In order to resolve this I selected all of vertices under the ROOT column and set the values to 0.  This now meant that when I moved the hip sway control, the vertices would no longer cave in on one another.  You can see that being demonstrated in this video below.

Now, the hips moved very functionally; the next stage was to emphasise the hip sway, through the use of the painting weights tool.  Now, I discovered a workflow of binding skin to a rig, which was to fix all the main problems using the component editor, but then to go over it and really give the character some expression by manually painting weights on.

Saturday, 12 November 2011

Binding the rig to the alien model

In order to bind the rig to the alien, so that the rig could now control the physical model, I applied a 'smooth bind', as this had an option of "painting the weights", so that I could control how much influence each joint had on the geometry of the model.  Here is a video of the process of binding the skin and then testing out the rig, to make sure that the initial bind has worked.
As you will see in this video, most of the rig is working fine; however, you will notice that there are severe problems with the left shoulder; if I move any of the upper body controls, this shoulder would twist around and disrupt a lof of the geometry around that area.  In order to stop this, I decided to open the Paint Weights tool (a tool that I will be using a lot more later on), and select the left shoulder joint.
As you see from this picture, this joint holds a huge amount of influence over the arm.  In order to take away this influence, I simply set the value of the brush to 0 and then flooded that area.  This meant that all of the influence that this joint had was flooded out.  This seemed to resolve this particular problem, but I would need to go back to this joint and paint the weights from scratch, as I am about to do with every other joint in this rig.

Tuesday, 8 November 2011

Channel Control

To make this rig as foolproof, to any animator, as possible, I am going to run through each control of the rig and check the attributes.  Anything that the animator is is not supposed to touch shall be locked and then, using the Channel Control, will be added to the Non-keyable hide list, so that the attributes become invisible.  This is a fairly straightforward stage, so I have documented this process in a video.  In this, you will see me going through each control, testing the essential attributes (i.e. with the Hand Controls, it is the Translate X, Y and Z attributes) and then locking and hiding any unnecessary attributes (i.e. with all of the controls, its would be the Scale X, Y and Z attributes, as these will not be used to animate the character) in the Channel Control window.

IK/FK Switch and Constraining

First of all, I am going to talk through the setting up of the IK and FK switches; this was a fairly easy thing to set up in both arms.  In the last post, you may have noticed, in the screenshots, these NURBS circles that were located at the shoulders and elbows; in addition to the wrist curve which I did mention in the last post.  These were going to serve as my FK controls and I needed to set up a system 
I started with the left arm by creating an attribute in the wrist control which was called IKFK Blend.  This was going to drive the Visibility of the shoulder and elbow curves (but not the wrist curve, as this needs to stay visible at all times, to control the orientation of the wrist and switch between IK and FK).  I keyframe the IKFK blend at 1 and the IK Blend in the IK Handle at 1.  I keyframed the shoulder and elbow curves visibility as off.
Next, I set the IKFKBlend to 10, and then I keyframed the shoulder and elbow curve visibility as on; and I keyfraned the IK Blend in the IK Handle as 0, meaning that it no longer influence the arm, when the IKFKBlend attribute was set to 10.  The IK arm control and Pole vector control were keyframed as well, so that it was invisible when IKFKBlend was set to 10 but visible when set to 1.  I repeated this whole task on the right arm.
 Next, I needed to constrain the shoulder and elbow curves to their respective joints.  I did this by applying both a Point and Orient constraint between these curves and joints.  I also parented the elbow curve to the shoulder curve with a simple shift select and press of the 'P' button.

Next, I needed to Constrain the wrist curve to the elbow curve.  However, I could not do this the conventional way as the wrist was already parented to the IK Handle control and this would mess up the hierarchy.

I resolved this by creating a group for the wrist curve only.  As the wrist curve itself was parented to the IK handle curve, I parented the group, to the elbow curve.  Now, when I rotated the elbow, or indeed the shoulder, the wrist would follow because the wrist itself was still constrained to the IK arm control but the node that I had put the wrist into would be parented to the elbow.  This is a neat trick that I will keep hold of for whenever I am at risk of disrupting any constraint or group hierarchy.

Now, here is a video to remind you of what the character rig is capable of doing so far.

Monday, 7 November 2011

Constraints, Pole Vectors and Drivers

In this post, I shall document how I constrained all the controllers to the rig, as well as creating the pole vectors.  I shall also talk about creating drivers for the hands to make them clench and do other things as well.  The first thing I did was to parent the "S" Clavicle controls to the IK handle, using a Point constraint.  A point constraint was correct to use in this case, as I had moved the pivot of the controller so that it snapped to the IK handle.
Once I had constrained both controllers, I grouped them in a group called 'ClavicleGroup', which would make it easier to manage these controllers in the outliner, and also if I wanted to keyframe both controllers simultaneously. 
 Next I parented both the ClavicleGroup and the neck to the back control, as the neck and shoulders would need to move along with the back.
 It would be too fiddly for the animator to move the IK handles to control the wrist, so to make the job easier, I parented the IK handles of each wrist to their respective arm controller.
 As I had with the knees, it is important that the elbow had the ability to move and change angle, independently of the wrist and shoulder, so to do this, I created pole vectors.
 I created these simply by duplicating the pole vector controls in the knees, snapping the to the elbows and then moving them back out.  I constrained these controls to their respective wrist IK handles using a Pole Vector constraint.
 The wrist would need to be able to rotate independently as well, so in order to do this, I selected this wrist control, which is the Circle curve, just inside the cube shaped arm control.
 I constrained this wrist control to the wrist with an Orient constraint, meaning that it now influenced the rotation of the wrist.
 Another thing which I tried but that I am not fully confident with was writing code to add an expression.  The purpose of doing so here would be to give the rotation of the wrist control a limited amount of influence of the forearm as well.  This is because the forearm also rotates, whenever the wrist rotates.  In nature, the rotation of the forearm is influences the rotation of the wrist, but as this is IK that we are dealing with, the reverse of these principles applies.
 Now when I rotate the wrist, the hand and forearm will both rotate.
The last thing that I shall describe in this post is the creation of the finger movement, with the finger joints being the driven and the wrist control being the driver.  I did not really follow the tutorial for this part, as I feel confident with setting driven keys, and furthermore, I wanted to exercise some creativity in this part.  As this is an alien, I felt I was free to play with the physicality of this character.

I set a maximum value of 10, a minimum value of -10 (unlike the tutorial which states to set it at 0) and a default value of 0.  When the fist is set to 10, it would severely clench, whereas when the driver is set to -10, the fingers would curl back, towards the knuckles.

As well as a fist attribute, I created a new attribute called Spread, which ranges from -5 to 5.  When set in the positive direction, the fingers spread out wide, whereas if they are set in the negative, they narrow.  Here is a video of my finger drivers in action.
Once I have finished the rig, I may set individual drivers for each of the fingers and do the same for each of the toes.  I may have mentioned my desire to set this up a few posts back, but I'm not sure.

Monday, 31 October 2011

Fingers and right arm.

The hands would not be as laborious to rig as the female model that came with the tutorial, primarily because I only had two big fingers and a thumb to rig.
This stage was just a matter of fitting the joints in the fingers and thumb, and then aligning them correctly in the top, front and side views.

Once that was done, I now had to parent these fingers to the wrist to make the hand.  In order to emphasise the grip in the fist, I decided to add an extra joint, called the leftHandPalm, which is marked by the pivot here.  This should hopefully make the range of movement in this hand greater.
As for the right arm, I could have mirrored the joints of the left arm, but I think that this may have caused problems when it came to binding the skin, as demonstrated a few posts back.
I decided to build the right arm from scratch and to try and make resemble the left arm joints as closely as possible.  I think this would also be good practice as I could get the hang of building arms, complete with IK/FK handles and controls.

Building the arms for the alien

This is an area where I tend to fall short when I'm rigging, so when it came to putting the joints in the arms, as well of the relevant controls, I would have to follow the relevant part of the Digital-Tutors tutorial to the letter.
 I initially started with three joints for the shoulder elbow, but I remembered to put another in the forearm, as I would need to set the IK handle here and then extend the effector to the wrist.  This is because the IK would only need to affect up to the forearm, as the wrist would have its own controls; however, at the same time, all the controls would need to be at the wrist in order to make it easier for the animator to operate.
Of course, I will now need to make sure that these joints are inside the arm and also positioned in a way that it wil bend accurately.  In this video, I found that the joint was actually outside the arm, so I just repositioned the joints, similarly to how I did the leg.  See this video.
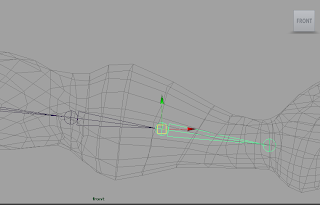
Another important part was to make sure that the local joint rotations were all in order and that they were all straight.  I did this by hitting Fn and F8 to check the rotations of the joints.  As you see below, all of the joints in the forearm are straight as they are all aligned with the X, Y and Z axis perfectly.
 The fingers, on the other hand, were a little out of line and had to be rotated slightly so that they could be as in line as possible.
 Checking the local rotations was something that I got the hang of fairly quickly, the next stage was to insert an IK handle to create that bend.  The bending point would have to be in the elbow, but the wrist would have to be free to move by itself.  Therefore the effector could only affect from the shoulder to the forearm.
How I did this was by clicking the starting point at the shoulder and then clicking the forearm to insert the handle.  Even though this handle was not going to impact on the wrist, it would need to be located at the wrist; as all of the controls for this arm would need to be based there.

In this video, you will see me relocating the effector to the wrist, using the Hypergraph.
Now, I can use the IK handle to move and bend the arm.  It is an IKRP so this means I can rotate the arm in several directions.
 Before moving on to the next stage, I needed to create some controllers that I would constrain a little later.  This wrist control, which will be used for moving the arm in IK mode was made simply by importing another cube and reshaping.
 I needed a shoulder control to move the shoulder up and down, so I just created this S curve using the same method I used for the Pole Vectors in the leg.